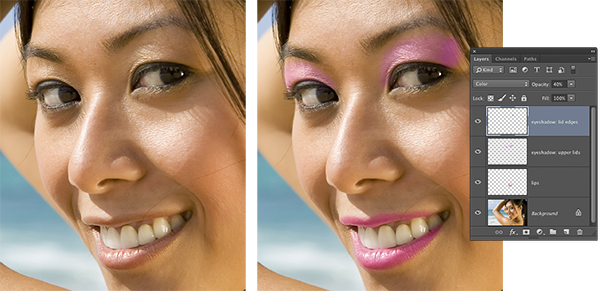
Applying Digital Makeup in Photoshop CC
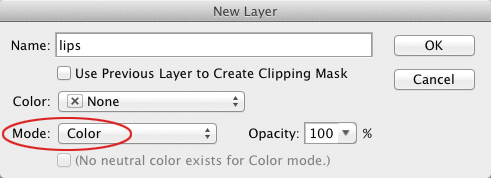
STEP ONE: Open an image and add a new layer by pressing Shift-Command-N (PC: Shift-Ctrl-N). In the resulting New Layer dialog, enter “lips” in the Name field and then set the Mode drop-down menu to Color. This menu lets you change the way color on one layer blends with color on another layer. Using the Color mode keeps the brightness of the tones in your photo, but adds the hue and saturation values from the paint you’re about to apply, letting the details of the image show through (Overlay mode also works). Click OK, and make sure the new layer lives above the photo layer in your layer stack.
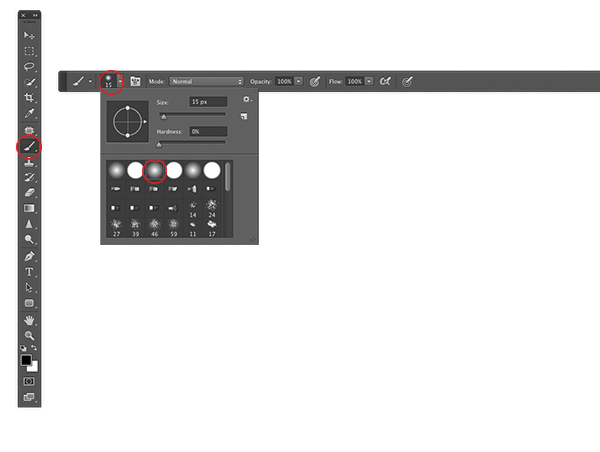
STEP TWO: Press B to activate the Brush tool (circled) and using the Brush Preset Picker in the Options Bar (also circled), pick a soft-edged brush.
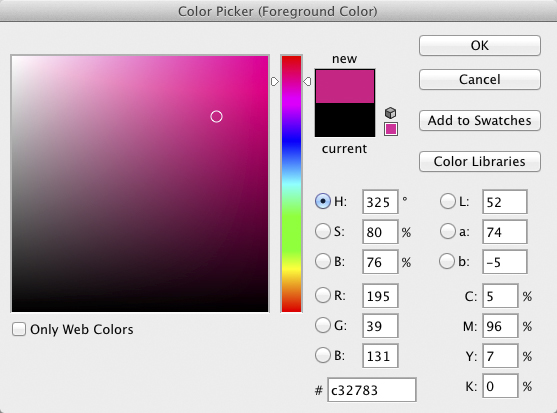
STEP THREE: At the bottom of the Toolbox, click the Foreground color swatch. In the resulting Color Picker, use the vertical rainbow-colored bar to set the color range (magenta was used here), and then click inside the large square to tell Photoshop how dark or how light you want that color to be. Click OK to close the dialog.
STEP FOUR: Mouse over to your image and paint across the lips. Use a larger brush for the inside of the lips and a smaller one for the edges. Tip: Press the Left Bracket key ([) to decrease brush size and the Right Bracket key (]) to increase it. Zoom in and out of your image by pressing Command — (PC: Ctrl –).
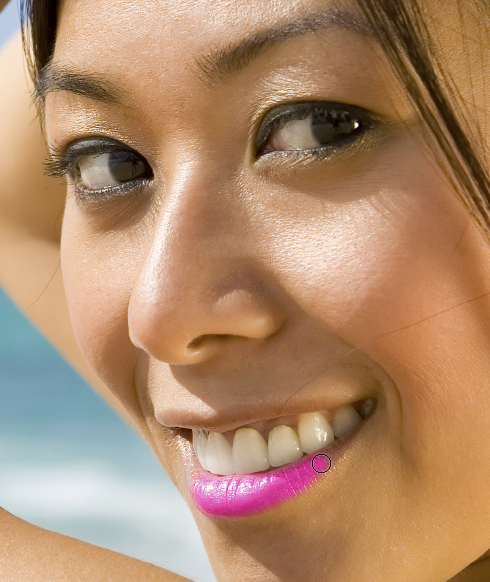
ISTOCKPHOTO, JACOMSTEPHENS, IMAGE #3391020
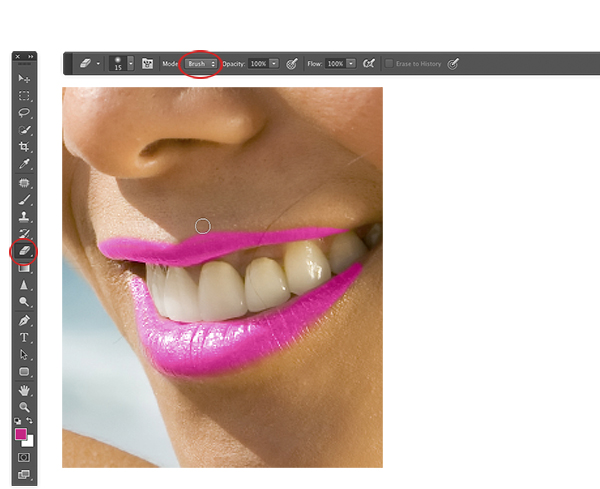
STEP FIVE: If you make a mistake, you can fix it with the Eraser tool. Press-and-hold the E key to temporarily activate the Eraser tool and, in the Options Bar, set the Mode menu to Brush and then pick a soft-edge brush from Brush Preset Picker (just like you did in Step Two). Then, while still holding down the E key, mouse over to your document and paint away the mistake. When you’re finished, release the E key and Photoshop automatically reactivates the Brush tool (this feature is called spring-loaded tools).
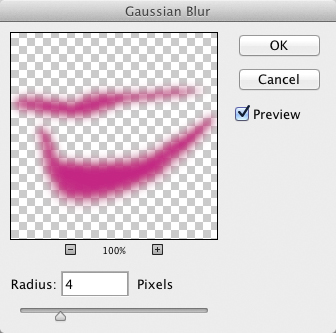
STEP SIX: With the lips layer active, choose Filter>Blur>Gaussian Blur. In the resulting dialog, experiment with the Radius to produce a very soft blur (4 pixels was used on this 1698×1131-pixel image). This helps the new lipstick blend in with surrounding pixels. If necessary, use the Eraser tool to fix areas of paint that have blurred beyond the lip edges.
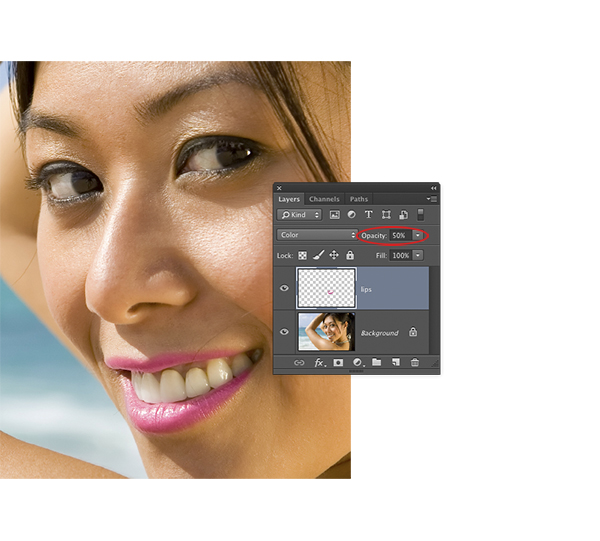
STEP SEVEN: Reduce the Opacity of the lips layer in the Layers panel to your liking (50% was used here).
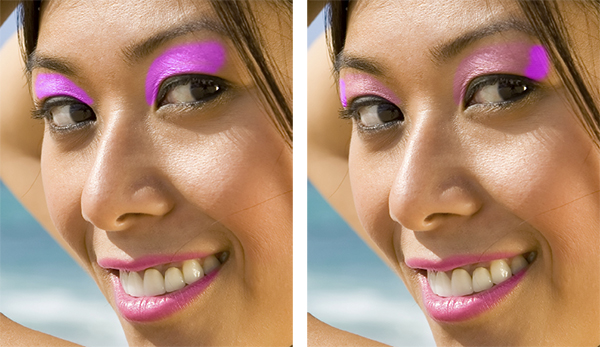
STEP EIGHT: Repeat Steps One-Seven to add eyeshadow, blush, etc. If adding multiple colors of eyeshadowâ”say, one for lower lids, one for upper lids, and one for the outer lid edgesâ”be sure to add each color on a separate layer for maximum editing flexibility. Here, you can see how the brushstrokes were applied prior to lowering layer Opacity and blurring.
Step Nine
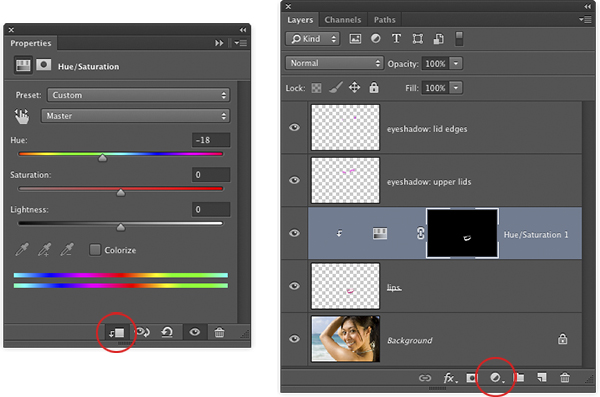
STEP NINE: To change the color on any layer, click to activate the layer and then load it as a selection by Command-clicking (PC: Ctrl-clicking) the layer’s thumbnail (when you do, you’ll see marching ants surround that area in your document). Next, click the half-black, half-white circle at the bottom of the Layers panel and choose Hue/Saturation. Photoshop adds the new layer above the currently active one and opens the Properties panel. Click the icon at the bottom left of the Properties panel to clip the Hue/Saturation layer to just one layer beneath it. Finally, use the Hue, Saturation, and Lightness sliders to tweak the color of makeup on that layer.
STEP TEN: Choose File>Save As and save the document as a PSD file. Saving the document in PSD format lets you go back and edit the individual layers later. Here’s the before and after version of the image, along with the final Layers panel.
